When it comes to home maintenance, few projects are as crucial as replacing your roof. A well-maintained roof not only enhances the aesthetic appeal of your home but also protects it from the elements, ensuring the safety and comfort of your family. However, understanding the roof replacement process can be daunting, especially for homeowners in Port Orchard, WA, where unique weather conditions can impact roofing decisions. In this guide, we will walk you through the essential steps involved in navigating the roof replacement process, empowering you with the knowledge you need to make informed choices. Whether you're dealing with leaks, missing shingles, or simply want to upgrade your home's exterior, this article will provide valuable insights into what to expect during a roof replacement project. From selecting the right materials to understanding local regulations and hiring trustworthy contractors, our comprehensive overview will help you tackle each aspect with confidence.
Join us as we delve into the intricacies of roof replacement in Port Orchard and equip yourself with the tools necessary to achieve a successful outcome for your home. When it comes to home safety and value, having a sturdy roof is paramount. A well-maintained roof not only protects the integrity of your home but also enhances its curb appeal and overall market value. However, many homeowners in Port Orchard, WA, may find themselves in a situation where a roof replacement is necessary. Understanding the roof replacement process can help you navigate this journey with confidence. The first step in the roof replacement process is assessing whether you truly need a new roof.
Common indicators include visible signs of damage such as leaks, missing shingles, or sagging areas. Additionally, if your roof is nearing the end of its lifespan—typically around 20-30 years for asphalt shingles—you may want to consider a replacement. Homeowners should also evaluate their roofs after severe weather events, as strong winds or heavy snowfall can lead to significant damage that might not be immediately apparent. Once you've established that a replacement is necessary, the next step is choosing a local contractor. In Port Orchard, WA, it's crucial to select a contractor who is not only experienced but also understands local building codes and weather conditions.
Start by checking credentials such as licensing and insurance. Reading online reviews and asking for references can provide insight into the contractor's reliability and quality of work. It's also beneficial to review past projects they have completed in your area to see their craftsmanship firsthand. Before any work begins, obtaining the necessary permits is essential. In Port Orchard, roof replacement projects typically require building permits to ensure compliance with local regulations.
Homeowners should contact the City of Port Orchard’s Planning and Community Development Department for specific requirements. Their website offers resources and forms that can simplify this process. Navigating local regulations can be daunting, but it ensures that your new roof meets safety standards and local building codes. When it comes to materials, Port Orchard homeowners often choose from a variety of roofing options, each with its pros and cons. Asphalt shingles are popular due to their affordability and ease of installation; however, they may not hold up as well against severe weather compared to metal roofs, which offer durability and longevity but come at a higher price point.
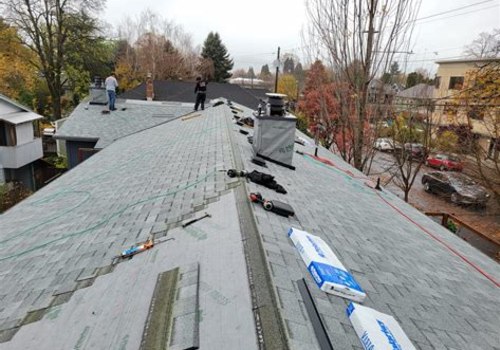
Other materials like cedar shakes or tile can provide aesthetic appeal but may require more maintenance. Understanding these materials will help you make an informed decision that aligns with your budget and preferences. As the roof replacement process moves forward, homeowners can expect several steps during installation. Initially, the contractor will conduct an inspection to outline the scope of work and prepare for the project. This includes removing the old roofing material and inspecting the underlying structure for any damage that needs repair.
The actual installation may take anywhere from a few days to a week, depending on the size of your roof and weather conditions. Preparation on the homeowner's part is crucial during this time. Clear the area around your home of any outdoor furniture or decorations to allow easy access for workers and equipment. Additionally, parking restrictions should be communicated with neighbors if necessary, as large trucks will be needed for material delivery. Throughout the process, common concerns may arise regarding noise levels, debris management, or timelines. Homeowners should feel free to discuss these concerns openly with their contractors; established companies will have protocols in place for minimizing disruption and keeping the job site clean. To illustrate these points effectively, consider local case studies or testimonials from residents who have recently undergone roof replacements in Port Orchard.
For instance, one homeowner shared how their choice of a metal roof not only enhanced their home’s exterior but also provided peace of mind during winter storms. Such stories highlight the importance of informed decision-making throughout the roof replacement process.In conclusion, understanding each phase of the roof replacement process equips homeowners in Port Orchard with the knowledge needed to make confident decisions. From assessing needs and selecting qualified contractors to navigating permits and choosing materials, every step is vital for achieving a successful outcome.
Assessing Your Roof Replacement Needs
Determining whether you need a roof replacement is crucial for maintaining your home’s safety and value. Homeowners in Port Orchard, WA, should keep an eye out for several key signs that indicate it may be time to invest in a new roof.Age is one of the primary factors; most roofs have a lifespan of 20-30 years, depending on the materials used. If your roof is approaching or has surpassed this age, it's wise to start considering a replacement. Another critical sign to watch for is leaks. If you notice water stains on your ceilings or walls, this could indicate that your roof is compromised. Inspect your attic for any signs of moisture or mold, which can also signal roof issues.
Additionally, check for missing or damaged shingles; if you find several shingles that are cracked, curled, or completely missing, this could be a strong indicator that your roof needs replacing. Furthermore, consider the overall condition of your roof. Look for sagging areas or significant wear and tear. If your roof appears uneven or has visible damage, it might not hold up against the elements. Lastly, if you find granules from asphalt shingles in your gutters, this can indicate that your roof is deteriorating and may soon require replacement. By being proactive and assessing these signs, homeowners can make informed decisions about their roofing needs.
Always consult with a professional contractor who understands the specific challenges and regulations in Port Orchard to ensure you get the best advice tailored to your situation.
Understanding Permits and Regulations
When embarking on a roof replacement project in Port Orchard, WA, it is crucial for homeowners to understand the necessary permits and regulations that govern the process. The city has specific guidelines to ensure safety and compliance, which can help protect your investment and maintain the aesthetic standards of the neighborhood. Before starting any work, homeowners should first check with the City of Port Orchard Planning and Building Department. Typically, a building permit is required for most roof replacements. This permit ensures that the new roof will meet local building codes and standards, which are designed to enhance safety and durability. In addition to obtaining a building permit, you may also need to consider other factors such as zoning regulations or historical preservation guidelines if your home is located in a designated area.It’s advisable to consult the city’s official website or contact city officials directly for the most accurate and up-to-date information regarding roofing permits.For homeowners looking to navigate this process smoothly, resources such as the Port Orchard Building Department website provide detailed information on permit applications, fees, and required documentation. Engaging a local contractor who is familiar with these regulations can also streamline the process and help ensure that all necessary permits are secured prior to beginning work. In summary, understanding the permits and regulations associated with roof replacement in Port Orchard is essential for a successful project. By taking these steps, homeowners can ensure that their new roof is not only aesthetically pleasing but also compliant with local laws.
Post-Replacement Considerations
After the successful installation of your new roof, it is essential to focus on several key post-replacement considerations to ensure its longevity and performance. Proper maintenance and timely inspections can significantly extend the life of your roof, safeguarding your investment. First and foremost, conduct a thorough inspection of your roof within the first few months after replacement.Look for any signs of leaks, loose shingles, or debris accumulation. Addressing these issues promptly can prevent more extensive damage down the line. Next, establish a routine maintenance schedule. It is recommended to inspect your roof at least twice a year, ideally in the spring and fall. During these inspections, check for wear and tear, moss growth, or any potential hazards that could compromise your roof's integrity. Additionally, keep gutters and downspouts clear of leaves and debris.
Proper drainage is crucial to preventing water from pooling on your roof, which can lead to leaks and structural damage. Regular cleaning will help maintain optimal water flow and protect your new investment. Consider having a professional roofing contractor perform an annual inspection. They can identify issues that may not be visible to the untrained eye and recommend necessary repairs or maintenance. Local contractors in Port Orchard, WA, often offer maintenance packages that can simplify this process for homeowners. Finally, be aware of local regulations regarding roof maintenance and inspections.
Some areas may require specific practices to be followed to ensure safety and compliance. Staying informed will help you maintain your roof effectively while adhering to local guidelines. By taking these post-replacement considerations seriously, homeowners can enjoy the benefits of a new roof for many years while ensuring their home remains safe and valuable.
Choosing a Local Contractor
When embarking on the roof replacement process, choosing a local contractor in Port Orchard is one of the most critical steps. A reputable contractor not only ensures quality workmanship but also provides peace of mind throughout the project. Here are some essential criteria to consider when selecting a roofing contractor.Experience and Expertise:
Look for contractors with a solid track record in roof replacements.Check how long they have been in business and whether they specialize in the type of roofing material you want. Experienced contractors are more likely to understand local building codes and regulations.
Licensing and Insurance:
Always confirm that the contractor is licensed to operate in Washington State and carries adequate insurance coverage. This protects you from liability in case of accidents or damages during the project. Request proof of insurance and verify its authenticity.References and Reviews:
Ask for references from past clients and check online reviews on platforms such as Google, Yelp, or Angie's List.Positive feedback from previous customers can indicate a contractor's reliability and quality of work.
Written Estimates:
Obtain detailed written estimates from multiple contractors. These should outline the scope of work, materials to be used, timeline, and costs. Be cautious of quotes that seem unusually low, as they may indicate inferior materials or rushed work.Communication:
Effective communication is vital during the roof replacement process. Choose a contractor who is responsive to your inquiries and provides clear explanations about the project timeline and procedures.Red Flags to Avoid:
Be wary of contractors who pressure you for an immediate decision or ask for a large upfront payment.Also, avoid those who lack transparency in their processes or refuse to provide documentation such as licenses or insurance certificates. By carefully evaluating these criteria, you can choose a local roofing contractor in Port Orchard who will guide you through the roof replacement process efficiently and effectively.
Roofing Materials: What Are Your Options?
When it comes to roof replacement, selecting the right materials is crucial for ensuring durability, aesthetics, and energy efficiency. In Port Orchard, WA, homeowners have several options to choose from, each with its own set of benefits and suitability for local weather conditions.Asphalt Shingles
are one of the most popular roofing materials due to their affordability and ease of installation. They are available in a variety of colors and styles, making them a versatile choice for many homeowners. Asphalt shingles typically last 15-30 years, depending on the quality and climate.They perform well in Port Orchard's temperate climate but may require replacement sooner if exposed to severe weather conditions.
Metal Roofing
is another excellent option for residents in Port Orchard. Known for its longevity and resistance to extreme weather, metal roofs can last 40 years or more. They are highly reflective, which can help reduce energy costs in warmer months. Additionally, metal roofs can withstand high winds and heavy rain, making them suitable for the Pacific Northwest's unpredictable weather.Wood Shake Shingles
offer a natural aesthetic that many homeowners find appealing.While they provide excellent insulation and can last up to 30 years, wood shakes require regular maintenance to prevent mold and rot, especially in the moist climate of Port Orchard. Homeowners considering this option should ensure they are prepared for ongoing upkeep.
Tile Roofing
, though less common, is another durable option that can withstand the region's weather challenges. Tile roofs are known for their exceptional longevity, often lasting over 50 years. They provide great insulation but can be heavier and may require additional structural support during installation. Finally, Composite Roofing has gained popularity as a synthetic alternative that mimics the look of wood or slate without the associated maintenance issues.These roofs are lightweight, durable, and resistant to fading and cracking. They can be a fantastic choice for homeowners looking for an attractive yet low-maintenance roofing solution. In summary, when navigating the roof replacement process, it's essential to consider the various roofing materials available. Each type offers unique benefits and considerations, particularly in relation to Port Orchard's local climate and weather conditions. Consulting with a professional roofing contractor can help you make an informed choice that best suits your home and budget.
The Roof Replacement Process: What to Expect
Replacing a roof is a significant investment for homeowners in Port Orchard, WA, and understanding the roof replacement process can help alleviate some of the stress associated with it.This process typically unfolds in several key steps, ensuring that your new roof is installed correctly and efficiently.
1.Initial Consultation
: The first step involves meeting with a qualified roofing contractor to discuss your needs and assess your current roof's condition. During this consultation, the contractor will evaluate the extent of any damage, potential upgrades, and provide an estimate for the project.2.Choosing Materials
: Once you decide to proceed, you will need to select materials for your new roof. Options may include asphalt shingles, metal roofing, or tiles, each with its unique advantages. Your contractor can help guide you based on your budget, home style, and local climate considerations.3.Obtaining Permits
: Before work can begin, it’s essential to secure any necessary permits required by local regulations in Port Orchard, WA.Your contractor should handle this process, ensuring compliance with all building codes.
4.Preparation and Safety Measures
: Prior to installation, the area around your home will be prepared to ensure safety and minimize disruption. This includes setting up scaffolding and protective barriers as needed, as well as notifying neighbors of the upcoming work.5.Removal of Old Roofing
: The next step involves removing the existing roofing material. This process can be noisy and messy but is critical for ensuring that the new roof adheres properly and that any underlying issues are addressed.6.Inspecting the Roof Deck
: After the old roof is removed, the underlying roof deck will be inspected for damage or rot. If repairs are needed, they will be made before proceeding with the installation of the new roofing material.7.Installation of New Roofing
: With everything prepped and repaired, your contractor will begin installing the new roofing materials.This phase is where your choices in materials come into play, and skilled installation is crucial to ensure longevity.
8.Final Inspection and Cleanup
: After installation is complete, a final inspection will be conducted to ensure everything meets quality standards. Cleanup will follow, removing debris and ensuring your property is left in excellent condition.9.Post-Installation Care
: Finally, understanding how to maintain your new roof is essential. Your contractor should provide guidelines on care and maintenance to help extend the life of your investment. By following these steps in the roof replacement process, homeowners in Port Orchard can ensure a successful transition to a new roof that enhances their home's safety and value. In conclusion, navigating the roof replacement process is a significant undertaking that requires careful consideration and professional guidance. As discussed, assessing your roof replacement needs is the first step, followed by choosing a local contractor who understands the unique challenges of roofing in Port Orchard, WA.Understanding the necessary permits and regulations is crucial to ensure compliance and a smooth project. Additionally, selecting the right roofing materials can greatly affect both the aesthetics and longevity of your new roof. Knowing what to expect during the roof replacement process can help alleviate stress, and considering post-replacement factors will ensure your investment remains protected. Ultimately, hiring a qualified local contractor is vital for a successful roof replacement. If you suspect your roof needs replacing, don’t hesitate to take action.
Contact local contractors today for quotes or consultations to secure the safety and value of your home.