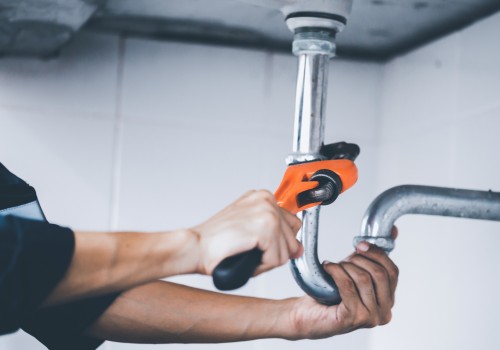
Home repairs are a normal part of owning a house. A small roof leak, loose gutter, dripping pipe, or damaged outlet may seem manageable at first, but delaying the repair can allow the problem to spread into nearby materials and systems.
Regular inspections help homeowners catch changes before they lead to water damage, safety concerns, structural problems, or higher utility costs. It is also important to understand which tasks are suitable for basic maintenance and which require a qualified professional.
Buildwith3h helps Port Orchard homeowners coordinate repairs involving roofing, plumbing, electrical systems, drywall, flooring, siding, and other residential construction work.
Create a Home Repair Priority List
Not every repair needs to be completed at the same time. Organizing problems by urgency can help homeowners direct their budget and attention toward the most important work.
Immediate concerns may include:
Active water leaks
Exposed or damaged wiring
Sewage backups
Gas odors
Structural movement
Broken stairs or railings
Failed heating during cold weather
Water near electrical equipment
Problems affecting safety or allowing water into the home should generally be addressed before cosmetic improvements.
Some repairs may also depend on other work. Damaged drywall should not be replaced until the roof or plumbing leak behind it has been corrected. New flooring should not cover a wet, weak, or uneven subfloor.
Keep a written list of minor problems as they appear. Record the location, visible symptoms, and whether the condition is changing. This can help with budgeting, inspections, and contractor conversations.
Inspect the Roof Regularly
The roof protects the home from rain, wind, debris, and changing weather. Damage may allow water to reach insulation, framing, ceilings, and walls before a leak becomes obvious indoors.
Look for visible signs such as:
Missing or loose roofing materials
Cracked or curling shingles
Damaged flashing
Debris buildup
Sagging areas
Loose gutters
Damaged vents
Exposed roof edges
Flashing around chimneys, vents, walls, skylights, and other roof openings deserves careful attention because these transitions can become common leak points.
The roof should also be checked after strong winds or severe weather. Materials may be loosened or damaged even when no water is visible inside the home.
Homeowners should not walk on steep, wet, damaged, or unstable roofing. Many roof conditions can be inspected from the ground, through accessible attic areas, or by a qualified roofing contractor.
Respond to Roof Leaks
A roof leak should be investigated as soon as possible, even when the indoor stain appears small.
Signs of water intrusion may include:
Ceiling stains
Damp insulation
Peeling paint
Soft drywall
Musty odors
Discolored framing
Water near light fixtures
Dripping during rain
The point where water becomes visible indoors may not be directly beneath the roof damage. Water can travel along rafters, pipes, sheathing, and other materials before entering the finished room.
Move belongings away from the affected area and use containers to catch manageable dripping when it is safe. Stay clear when water is near electrical wiring, fixtures, or a sagging ceiling.
The roof source should be repaired before ceiling, wall, insulation, or paint repairs begin. Wet materials may also need drying or removal before the area is closed.
Patching the interior stain without correcting the exterior leak will only hide the warning sign while the damage continues.
Maintain Gutters and Downspouts
Gutters collect roof runoff and direct it away from siding, walkways, and the foundation.
Leaves, branches, roofing debris, and other materials can block water flow. When gutters overflow, water may run behind siding, damage trim, collect near the foundation, or create slippery areas below.
Routine maintenance should include:
Removing debris
Checking gutter slope
Tightening loose sections
Repairing leaking joints
Inspecting hangers and fasteners
Clearing downspout openings
Directing discharge away from the home
Watch how the system performs during rain when it can be observed safely. Overflow in one area may reveal a clog, poor slope, or damaged connection.
Downspouts should release water where it can move away from the foundation without creating erosion or directing runoff toward neighboring property.
Gutter cleaning should only be completed from a stable and safe access point. Tall, steep, or difficult areas are better handled by professionals with suitable equipment.
Repair Exterior Siding and Trim
Siding and exterior trim help protect the walls beneath them from water and weather exposure.
Inspect the exterior for:
Cracks
Loose panels or boards
Rot
Swelling
Open joints
Failed sealant
Peeling finishes
Insect damage
Gaps around openings
Pay close attention to windows, doors, corners, roof connections, utility penetrations, and areas near decks or porches.
Damaged siding or trim should be repaired before water reaches the sheathing, insulation, or wall framing behind it. Replacing only the visible surface may not be enough when moisture has already entered the wall.
Failed sealant may need replacement where joints were designed to be sealed, but sealant should not be used to cover rot, movement, or improper drainage.
New materials should match or complement the existing exterior while maintaining the proper weather-resistant details around openings and transitions.
Address Peeling Exterior Paint
Peeling, bubbling, or cracking exterior paint may indicate normal aging, poor surface preparation, or moisture beneath the coating.
Before repainting, inspect the affected siding and trim for:
Rot
Swelling
Open joints
Failed sealant
Water stains
Loose materials
Damage around windows or doors
Painting over damp or deteriorated materials will not correct the underlying problem. The new coating may begin failing again soon after the work is complete.
Damaged siding or trim should be repaired first. Loose paint should then be removed, and the surface should be cleaned and prepared for the new coating.
Paint and primer should be suited to the exterior material and weather exposure. Proper preparation is just as important as the finish product when protecting the home from moisture.
Inspect Windows for Leaks and Drafts
Windows can allow water or outside air into the home when frames, seals, flashing, or surrounding materials fail.
Signs of a window problem may include:
Water stains around the opening
Damp or soft drywall
Peeling paint
Swollen trim
Condensation between glass panes
Noticeable drafts
Cracked frames
Difficult operation
A draft does not always mean the entire window must be replaced. The problem may involve weatherstripping, an adjustable component, or a small opening around the frame.
Water intrusion requires closer investigation. Failed exterior sealant may be involved, but the source could also be damaged flashing, siding, roofing, or drainage above the window.
The opening should be repaired before damaged drywall, insulation, or trim is replaced. Covering the interior stain will not stop water from entering the wall.
Repair Exterior and Interior Doors
Doors may begin sticking, sagging, rattling, or allowing air and water into the home as hardware and surrounding materials wear.
Inspect:
Hinges
Latches
Locks
Frames
Thresholds
Weatherstripping
Exterior sealant
Door surfaces
Loose hinges or worn hardware may cause the door to hang unevenly. Damaged weatherstripping can allow drafts, while a deteriorated threshold may let water reach the flooring or framing below.
A sticking door can sometimes be adjusted, but it may also indicate moisture swelling or movement in the surrounding structure.
The cause should be identified before trimming the door or forcing it to close. Removing material may create a larger gap if the original problem later changes.
Severely damaged doors or frames may need replacement when repairs cannot restore safe operation, security, or weather resistance.
Watch for Foundation and Structural Changes
Cracks and movement should be monitored so homeowners can distinguish a minor finish issue from a condition that needs further evaluation.
Possible warning signs include:
New or widening cracks
Sloped or uneven floors
Doors and windows that begin sticking
Gaps between walls and ceilings
Separated trim
Sagging areas
Moisture near the foundation
Movement in decks or porches
Not every crack indicates major structural failure. Small changes can occur as materials expand, contract, and settle.
Pay attention to whether the condition is new, growing, or appearing in several parts of the home. Photographs and measurements can help track changes over time.
Drainage should also be reviewed. Water collecting near the foundation can contribute to moisture problems and soil movement.
Widespread or active movement should be evaluated before cosmetic repairs are completed. Patching cracks without addressing the cause may only hide the problem temporarily.
Repair Cracked Drywall
Drywall cracks may result from normal movement, poor joint finishing, moisture, or changes in the framing behind the surface.
Before patching the area, inspect the crack’s shape, location, and history.
A small isolated crack may be cosmetic. Repeated cracking, wide openings, sagging surfaces, or damage around doors and windows may point to movement that needs further investigation.
Moisture-damaged drywall may feel soft, appear stained, or develop bubbling paint and musty odors. The leak or moisture source should be corrected before repairs begin.
The repair may involve:
Removing loose material
Reinforcing the joint
Applying joint compound
Matching the existing texture
Priming and painting
Wet or heavily damaged drywall should be removed rather than covered.
When cracks repeatedly return, the framing, foundation, or nearby structural connections may need to be reviewed before the surface is repaired again.
Address Water-Damaged Walls and Ceilings
Water-damaged walls and ceilings should not be repaired until the moisture source has been identified and corrected.
Possible sources include:
Roof leaks
Plumbing leaks
Failed window flashing
Exterior siding damage
Condensation
Overflowing fixtures
Appliance connections
Stains may appear far from the actual leak because water can travel along framing, pipes, and other materials before reaching the finished surface.
Soft drywall, sagging ceilings, bubbling paint, and musty odors may indicate that moisture has entered concealed areas. Wet insulation and damaged framing may also need inspection.
Materials that cannot be dried or restored should be removed. The remaining structure should be allowed to dry before new insulation, drywall, texture, or paint is installed.
When water is near electrical wiring or fixtures, avoid the affected area until it has been evaluated safely.
Repair Damaged Flooring
Flooring can become damaged by moisture, impact, wear, loose installation, or movement beneath the finished surface.
Common problems include:
Loose boards
Cracked tile
Torn or lifting flooring
Water stains
Swollen materials
Soft spots
Uneven transitions
Damaged grout
The cause should be identified before replacement materials are installed.
Water-damaged flooring may indicate a plumbing leak, appliance connection failure, exterior water intrusion, or moisture beneath the floor. The subfloor should be inspected for rot, swelling, and loss of strength.
Loose tile or repeated cracking may point to movement in the subfloor or an unsuitable installation surface.
Repairing the base first can prevent the same problem from affecting the new flooring. Transitions between existing and replacement materials should also be planned so they remain secure and easy to walk across.
Fix Creaking or Uneven Floors
Creaking floors may result from movement between the flooring, subfloor, fasteners, and framing.
The sound may occur in one small area or across a larger section of the room. Accessible framing beneath the floor can sometimes help reveal loose connections, damaged materials, or missing support.
Uneven floors may involve:
Loose subflooring
Worn or damaged framing
Moisture
Foundation movement
Previous alterations
Improper installation
Normal changes in older materials
Minor noise may be corrected by securing loose components. More widespread slope, movement, or soft flooring requires further inspection before a surface repair is attempted.
New flooring should not be used to hide structural movement or a damaged subfloor.
The source of the movement should be corrected first so the repaired floor remains stable.
Handle Common Plumbing Leaks
Plumbing leaks may occur at faucets, valves, supply lines, drains, appliance connections, or exposed piping.
Homeowners should watch for:
Dripping water
Corroded fittings
Mineral deposits
Damp cabinets
Water stains
Swollen flooring
Musty odors
Unexpected pressure changes
The affected fixture or branch should be shut off when necessary and when the valve can be reached safely.
Visible water may not appear directly beneath the leak. It can travel through cabinets, flooring, walls, or ceilings before becoming noticeable.
Temporary tape, clamps, or containers may help control a small leak briefly, but they should not replace a proper repair.
The plumbing source should be corrected before drywall, flooring, cabinets, or trim are restored. Wet materials may also need drying or removal.
Clear Slow and Clogged Drains
Slow drains should be addressed before they become complete blockages or backups.
Hair, soap, grease, food waste, and other debris can collect inside traps and piping. Drain screens and strainers can help keep larger materials from entering the system.
Avoid putting the following items into drains or toilets:
Cooking grease
Wipes
Paper towels
Hygiene products
Coffee grounds
Food scraps
Excess hair
Other non-dissolving materials
A plunger may clear a straightforward fixture clog. Homeowners may also be able to remove visible debris from an accessible stopper or drain screen.
Stop using the fixture when wastewater begins backing up.
When several drains slow down together, water appears in another fixture, or clogs keep returning, the problem may be located deeper in a shared drain. Repeated temporary clearing should not replace a complete inspection of the drainage system.
Repair Running and Leaking Toilets
A toilet may waste water or damage nearby materials even when the problem appears minor.
Internal leaks often involve:
A worn flapper
A damaged fill valve
An incorrect float setting
A loose or tangled chain
Worn tank seals
Mineral buildup
Listen for the toilet refilling when it has not been used. Water may be moving slowly from the tank into the bowl without creating a visible leak on the floor.
Moisture around the base may point to a failed connection, loose fitting, tank problem, or damaged toilet seal. The surrounding flooring and subfloor should be checked when water has been present for more than a brief period.
Simple internal parts may be replaced when the fixture is otherwise in good condition.
A toilet that clogs often, leaks repeatedly, rocks at the base, or performs poorly after several repairs may need a more complete evaluation or replacement.
Maintain the Water Heater
Water heaters should be checked regularly for leaks, corrosion, and changes in performance.
Possible warning signs include:
Water near the tank
Rust or corrosion
Limited hot water
Changing water temperature
Unusual sounds
Slow recovery
Discolored water
Leaking valves or connections
Keep the area around the equipment clear so the tank, shutoff valve, connections, and controls remain accessible.
Maintenance needs can vary based on the unit type, water conditions, equipment design, and manufacturer instructions. Some systems may need periodic flushing, filter care, or inspection of specific components.
A leaking connection may be repairable. A tank leaking through its body will often require replacement rather than a temporary patch.
Save the model number, warranty information, installation records, and service history. These details can help when parts or replacement equipment are needed.
Recognize Electrical Repair Warning Signs
Electrical problems can create fire, shock, and equipment-damage risks.
Homeowners should watch for:
Flickering lights
Repeated breaker trips
Hot outlets or switches
Burning odors
Buzzing sounds
Sparks
Discolored wall plates
Loose outlets
Power loss in part of the home
Stop using damaged outlets, switches, cords, or equipment until the problem has been evaluated.
Do not open electrical panels, remove wiring, or handle concealed electrical components without proper training. Turning off a breaker does not always make every nearby component safe to touch.
Heat, smoke, sparks, or a burning smell should be treated as urgent concerns. Leave the area and contact emergency services when there is an immediate fire risk.
Recurring electrical problems should be diagnosed by a qualified electrician rather than managed through repeated breaker resets or temporary workarounds.
Repair Outlets, Switches, and Lighting
Loose fixtures, cracked covers, nonworking switches, and damaged outlets should be repaired before they become larger safety concerns.
Common issues may include:
Loose wall plates
Outlets that no longer hold plugs
Switches that feel warm
Lights that flicker
Fixtures that hang unevenly
Broken covers
Buzzing dimmers
Exposed wiring
A failed light bulb should be ruled out before assuming the fixture or circuit is damaged. When several devices on the same circuit stop working, the problem may extend beyond one outlet or switch.
The circuit should also be reviewed for overload when breakers trip repeatedly or equipment loses power during normal use.
Electrical repairs connected with remodeling may require coordination with drywall, cabinets, ceilings, and trim.
Larger changes, new circuits, panel work, and concealed wiring may require permits or inspections based on the project scope.
Maintain Heating and Cooling Equipment
Heating and cooling systems should be maintained before seasonal demand places the greatest load on them.
Homeowners can help by keeping vents, returns, and equipment areas clear. Filters should be replaced or cleaned as appropriate for the system.
Warning signs may include:
Uneven room temperatures
Unusual sounds
Burning or musty odors
Water near equipment
Weak airflow
Frequent cycling
Rising utility use
Difficulty reaching the thermostat setting
Outdoor equipment should remain clear of leaves, debris, and stored materials.
Service should be scheduled when performance begins changing rather than waiting for the system to stop working completely.
Heating and cooling repairs may also involve electrical, drainage, ventilation, or structural access work. These areas should be coordinated so the equipment problem is corrected before damaged drywall, flooring, or nearby finishes are restored.
Improve Insulation and Air Sealing
Damaged or missing insulation can make parts of the home uncomfortable and increase heating or cooling demands.
Common problem areas include:
Attics
Exterior walls
Crawl spaces
Floors above garages
Areas around windows and doors
Utility openings
Additions and remodeled rooms
Drafts may enter through gaps around pipes, wiring, vents, frames, and other exterior openings. Suitable gaps can often be sealed, but required ventilation and drainage paths should not be blocked.
Insulation that becomes wet may lose performance and hold moisture against framing or other materials. The roof, plumbing, window, or exterior leak should be repaired before new insulation is installed.
Air-sealing and insulation repairs may need to be coordinated with roofing, siding, drywall, and electrical work.
The goal is to improve comfort without trapping moisture or covering a problem that still allows water or outside air into the home.
Repair Bathroom Moisture Problems
Bathrooms regularly produce heat and moisture, making them vulnerable to damaged finishes, failed seals, and hidden leaks.
Inspect areas around:
Tubs and showers
Toilets
Sinks
Cabinets
Flooring
Exhaust fans
Windows
Plumbing penetrations
Cracked or missing sealant may allow water into joints around fixtures. Failed waterproofing, leaking valves, damaged drains, or poor ventilation can cause more extensive moisture problems behind finished surfaces.
Soft drywall, swollen cabinets, loose tile, stained ceilings, and damaged flooring should be investigated before cosmetic repairs begin.
The water source must be corrected first. Wet materials should then be dried or removed before new drywall, flooring, cabinets, or finishes are installed.
A working exhaust fan can help control normal humidity, but ventilation will not correct an active plumbing leak or failed waterproofing system.
Repair Kitchen Cabinets and Counter Areas
Kitchen cabinets and counters can become damaged by plumbing leaks, appliance connections, spills, loose hardware, and everyday wear.
Check beneath sinks and near dishwashers, refrigerators, and other water-using appliances for:
Dampness
Swollen cabinet panels
Loose shelving
Water stains
Corroded hardware
Damaged supports
Musty odors
Soft flooring
Loose hinges, handles, and drawer hardware may be tightened or replaced when the surrounding material remains solid.
Swollen particleboard or heavily deteriorated cabinet panels may not return to their original condition after drying. Replacement may be more practical when the material has lost strength.
Counter movement or gaps around sinks can allow water into the cabinet below. Plumbing connections, sink mounting, and suitable seals should be checked before damaged finishes are restored.
Repairs should correct both the visible cabinet damage and the leak or movement that caused it.
Check Appliance Connections
Appliances connected to water supplies or drains should be inspected regularly.
Common areas include:
Washing-machine hoses
Dishwasher connections
Refrigerator water lines
Ice-maker tubing
Water-treatment equipment
Utility-sink connections
Appliance shutoff valves
Look for cracking, bulging, corrosion, loose fittings, dampness, and mineral deposits. Supply lines should not be crushed, sharply bent, or positioned where they rub against nearby surfaces.
Shutoff valves should remain accessible so water can be stopped quickly during a leak.
Damaged hoses, valves, and fittings should be replaced with products suited to the appliance. A small connection leak can damage cabinets, flooring, drywall, and rooms below before it becomes obvious.
Leak sensors or automatic shutoff devices may provide added protection in laundry rooms, kitchens, and utility areas.
Maintain Decks, Porches, and Exterior Steps
Decks, porches, and exterior steps should be inspected for conditions that could affect safety or structural performance.
Check:
Decking boards
Stair treads
Railings
Guard posts
Support posts
Beams and framing
Fasteners
Connections to the home
Concrete landings
Loose railings, damaged steps, rotted boards, and unstable supports should be repaired promptly.
Water collecting around posts or beneath the structure can contribute to rot, corrosion, or soil movement. Drainage should move water away from supports and the home.
Surface coatings may help protect suitable materials, but they should not be used to hide decay or weak framing.
Major reconstruction, structural changes, or replacement of stairs and guards may require permits or inspections. Requirements should be confirmed based on the actual scope of work.
Address Mold-Like Growth and Musty Odors
Mold-like growth and persistent musty odors often point to a moisture problem that should be investigated.
Possible sources include:
Roof leaks
Plumbing leaks
Poor bathroom ventilation
Window or siding failures
Damp crawl spaces
Condensation
Drainage problems
Appliance connection leaks
Painting over growth or using air fresheners may hide the warning signs without correcting the source.
The affected area should be inspected for damp drywall, insulation, flooring, framing, cabinets, and other materials that may have absorbed moisture.
The leak or humidity problem should be corrected before damaged materials are cleaned, removed, or replaced.
Larger affected areas, sewage-related moisture, or growth inside concealed spaces may require professional evaluation and cleanup. Homeowners should avoid disturbing materials when they are unsure how far the problem extends.
Know Which Repairs Homeowners Can Handle
Some basic repair and maintenance tasks can be completed safely with common tools and a clear understanding of the work.
Homeowners may be able to:
Replace basic door or cabinet hardware
Clean gutters from safe access points
Check beneath sinks for visible leaks
Change HVAC filters
Clean removable faucet aerators
Complete simple cosmetic patches
Use a plunger on a basic clog
Work should stop when the repair involves roofing hazards, structural movement, concealed wiring, gas connections, sewage, or active water damage that cannot be isolated safely.
Using the wrong tool or forcing damaged materials can turn a small problem into a larger repair.
Homeowners should also avoid opening walls or disconnecting equipment when they do not know how to shut off the related water, power, or gas supply.
Understand When Permits May Be Required
Some home repairs require permits or inspections based on the type and scope of work.
Permit review may apply to:
Structural repairs
Major plumbing changes
New electrical circuits
Panel or service work
Heating and cooling equipment
Deck reconstruction
Exterior additions
Changes to load-bearing walls
Minor repairs may not require the same review as major alterations, but homeowners should not assume a project is exempt simply because the damaged area appears small.
Requirements should be confirmed for the actual Port Orchard property and repair scope.
The contractor agreement should explain who will obtain permits, schedule inspections, respond to corrections, and keep the required records.
Work that requires inspection may need to remain exposed until approval is received. Covering framing, wiring, plumbing, or insulation too early can lead to added demolition and delays.
Prepare for Emergency Repairs
Basic preparation can help homeowners respond more quickly when a leak, outage, or safety problem occurs.
Locate the main water shutoff and learn how it operates. The electrical panel, appliance valves, and other important controls should also remain accessible.
Keep contact information for:
Plumbers
Electricians
Roofing contractors
Heating and cooling contractors
Utility providers
Insurance representatives
Emergency services
Move people and animals away from unsafe areas during an emergency. Do not enter standing water near electrical equipment or remain inside when gas, fire, smoke, or structural instability is suspected.
Emergency services or the appropriate utility should be contacted when there is an immediate threat to life or safety.
A clear response plan can limit confusion and help reduce damage while professional assistance is arranged.
Build a Home Repair Budget
Setting aside money for maintenance and repairs can make unexpected problems easier to manage.
A repair budget may include:
Routine inspections
Plumbing service
Roof repairs
Electrical work
Heating and cooling maintenance
Exterior repairs
Appliance connections
Drywall and flooring restoration
Safety concerns, active leaks, water intrusion, and structural problems should be prioritized before cosmetic improvements.
The full repair cost may include more than the damaged part. Homeowners should also account for access work, demolition, drying, cleanup, disposal, and restoration of nearby finishes.
Hidden damage may become visible after walls, floors, roofing, or cabinets are opened.
Keeping some flexibility in the budget can help cover necessary added work without delaying the repair or removing important parts of the project.
Compare Repair Estimates Carefully
Repair estimates should be compared by the full scope of work rather than the total price alone.
A clear proposal should explain:
The diagnosed problem
The recommended repair
Materials being used
Labor and access requirements
Permit and inspection responsibilities
Cleanup and disposal
Finish restoration
Warranty terms
How added work will be approved
Ask whether the estimate covers a temporary repair or a permanent correction. A lower price may only address the visible symptom while leaving damaged materials or the underlying cause untreated.
Restoration work may also be excluded. A plumber may repair a pipe without replacing drywall, flooring, cabinets, or paint damaged by the leak.
When estimates differ significantly, compare what each contractor has included before deciding. Clear scope and repair methods are often more useful than the lowest number.
Keep Home Repair Records
Repair records help homeowners track recurring issues and give future contractors useful information.
Keep copies of:
Estimates
Contractor agreements
Invoices
Inspection reports
Permits
Warranties
Product manuals
Change orders
Material information
Final approval documents
Photograph damage before work begins and after repairs are complete. When walls, floors, or ceilings are opened, take pictures of concealed framing, plumbing, wiring, and insulation before they are covered.
Record when leaks, cracks, noises, or equipment problems first appeared. A pattern of repeated repairs in one area may point to a larger condition that needs further investigation.
Store the records where they can be found during future maintenance, remodeling, insurance discussions, or property sales.
Choose a Qualified Home Repair Contractor
The right contractor should have experience diagnosing the type of problem affecting the home.
Review registration, insurance, references, and examples of similar repair work. Ask how the contractor plans to find the cause before replacing materials or equipment.
The written proposal should clarify:
The complete repair scope
Materials and products
Permit responsibilities
Subcontractor work
Cleanup and disposal
Restoration that is included or excluded
Warranty coverage
Payment terms
Change-order procedures
Ask who will supervise the project and how progress or unexpected conditions will be communicated.
Choose a contractor who explains repair priorities clearly. A reliable professional should be able to distinguish urgent work, maintenance that can be scheduled, and cosmetic improvements that are optional.
Protect Your Home With Timely Repairs
Small repair needs are easier to manage when they are addressed before damage spreads.
A minor roof leak can affect insulation and ceilings. A slow plumbing leak can damage cabinets and flooring. Loose railings, damaged wiring, blocked drainage, and failing exterior materials may also create larger safety or structural concerns over time.
Regularly inspect roofing, gutters, siding, plumbing fixtures, electrical components, heating and cooling equipment, decks, and interior finishes. Pay attention to changes rather than waiting for complete failure.
Repairs should correct the source of the problem before damaged surfaces are covered or replaced.
Buildwith3h helps Port Orchard homeowners coordinate home repairs involving roofing, plumbing, electrical systems, drywall, flooring, siding, cabinets, and other residential construction work.
Contact us to discuss the repairs needed to protect your home and keep it safe, comfortable, and functional.