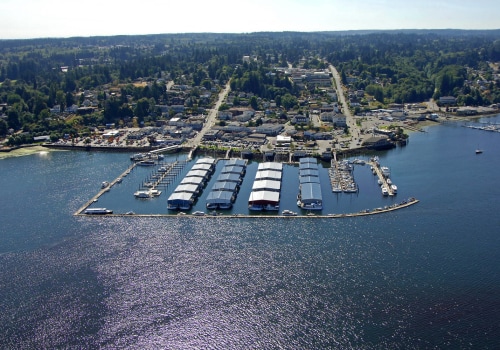
Identifying and Solving Common Roofing Problems in Port Orchard

  1. Roofing Services
  2. Roof Repairs and Maintenance
  3. Common roofing issues and solutions

Roofing problems often begin quietly. A lifted shingle, loose piece of flashing, clogged gutter, or small patch of moss may not look serious at first, but repeated rain can allow the damage to spread beneath the visible surface.

Once moisture reaches the roof deck, it can affect insulation, framing, drywall, and interior finishes. Finding the cause early can make the repair more manageable and reduce the risk of damage to other parts of the home.

Port Orchard’s rain, shade, wind, surrounding trees, and damp conditions can contribute to leaks, organic growth, damaged roofing materials, and drainage problems.

Buildwith3h helps Port Orchard property owners identify roofing concerns and coordinate repairs, drainage improvements, structural corrections, and related exterior construction.

Begin With a Complete Roof Inspection

A roofing problem should be evaluated as part of the complete roof system rather than judged only by the most visible symptom.

A water stain may point to a leak, but it does not identify where the water entered. Missing shingles may expose one section while damage beneath nearby materials remains hidden. Moss may also cover cracked or lifted roofing that cannot be seen from the ground.

A complete inspection should review the roofing surface, roof edges, valleys, flashing, gutters, downspouts, vents, skylights, chimneys, and other penetrations. The attic should also be checked for moisture, darkened wood, wet insulation, condensation, and damaged decking.

Begin from the ground when possible. Binoculars or a camera with a zoom feature can help identify missing materials, uneven rooflines, sagging sections, debris, and displaced flashing without requiring unsafe roof access.

The inspection should also consider the roof’s age, material, previous repairs, and recent weather. A newer roof with one damaged shingle may need a limited repair, while repeated leaks across an older roof may point to a broader problem.

Steep, wet, moss-covered, or damaged roofs should be inspected by a qualified contractor. The goal is to understand the complete condition of the roof without creating an injury or causing more damage through foot traffic.

Identify the Source of a Roof Leak

Roof leaks can be difficult to trace because water does not always drip directly below the opening.

Moisture may move along roof decking, rafters, pipes, insulation, or other materials before appearing on a ceiling or wall. A stain in one room may come from damaged flashing, a valley, a vent, or roofing several feet away.

Common signs of a leak include water stains, damp insulation, peeling paint, musty odors, darkened framing, mold-like growth, and dripping sounds during rain. A stain that appears dry may still point to an active problem that occurs only during certain wind or rainfall conditions.

The attic can provide helpful clues. Check beneath chimneys, skylights, plumbing vents, valleys, and roof transitions during or shortly after rain when practical. Wet decking, rusted fasteners, and compressed or stained insulation may help narrow down the source.

The roofing surface should then be inspected for cracked materials, loose flashing, lifted shingles, failed vent boots, and openings around penetrations.

Surface sealants or roofing cement may provide temporary protection in limited situations, but they should not replace a proper repair. Covering the visible area without correcting damaged flashing or roofing can allow water to continue entering beneath the patch.

Active leaks should be addressed promptly. Water near electrical systems, sagging ceilings, widespread attic moisture, or damaged framing requires immediate professional attention.

Address Missing or Damaged Shingles

Asphalt shingles form the visible outer layer of many residential roofs. When they become loose, cracked, curled, or missing, the materials beneath them may be exposed to rain and wind.

Homeowners may notice missing tabs, lifted edges, loose ridge caps, surface cracks, blisters, dark patches, or large amounts of granules collecting in the gutters. These changes may develop through age, weather exposure, impact, poor fastening, or previous installation problems.

A single damaged shingle may sometimes be replaced without removing the surrounding roof. The repair still needs to match the existing material and restore the correct overlap, fastening, and water-shedding pattern.

The area beneath the missing or damaged shingle should also be inspected. Torn underlayment, exposed fasteners, soft decking, and old flashing may require attention before the replacement material is installed.

Matching older shingles can be difficult when the original product has been discontinued or has changed color with age. A similar replacement may protect the roof even when the color is not exact, but the difference should be discussed before work begins.

Widespread curling, cracking, granule loss, or repeated missing shingles may indicate that the roof is reaching the point where broader replacement should be considered.

Do not walk across brittle, wet, or moss-covered shingles to inspect them. Foot traffic can crack older materials or loosen sections that were still attached.

Watch for Wind-Damaged Roofing

Strong winds can damage roofing without removing large sections from the home.

Shingles may lift and then settle back into place, leaving broken seals or loosened fasteners that are difficult to see from the ground. Metal panels, ridge caps, flashing, trim, and roof-edge materials may also shift during a storm.

After high winds, check the property for roofing pieces, loose fasteners, granules, bent metal, and branches on the ground. From a safe location, look for uneven shingle lines, raised corners, missing ridge materials, displaced flashing, and panels that appear lifted or misaligned.

Roof edges and ridges often receive strong wind pressure. Damage in these areas can allow later rain to move beneath the roofing even when the interior remains dry immediately after the storm.

Wind-driven branches and debris may crack shingles, dent metal, break tile, damage vents, or weaken the roof deck. Siding, soffits, fascia, gutters, and windows should also be checked for impact.

Photograph visible storm damage before cleanup or temporary repairs begin. This can help the contractor understand the event and may support an insurance discussion when coverage applies.

A professional inspection is appropriate when winds were severe, roofing materials are missing, or damage may be concealed. Temporary coverings should be installed carefully and followed by a lasting repair once the full condition is known.

Manage Moss and Algae Growth

Moss and algae commonly develop where roofing remains shaded and damp.

North-facing roof slopes, areas beneath trees, valleys, and sections behind chimneys may dry more slowly than open areas exposed to sunlight. Leaves and pine needles can hold additional moisture against the surface.

Moss can grow beneath shingle edges and gradually lift them. It may also block runoff, hide cracks, and keep the roofing damp for longer periods. Thick growth can spread into valleys and gutters, creating additional drainage problems.

Algae may appear as dark streaks across the roof. It may be more of an appearance concern in some cases, but the surface should still be inspected to confirm that other growth or roofing damage is not present.

Avoid pressure washing and aggressive scraping. These methods may remove protective granules, damage wood roofing, break tile, disturb flashing, or force water beneath the roof surface.

Cleaning products should be approved for the specific roofing material and used according to the manufacturer’s directions. A method suited to asphalt shingles may not be appropriate for metal, wood, tile, or synthetic products.

The conditions supporting repeated growth should also be addressed. Trimming selected branches, removing debris, cleaning gutters, and improving drainage may help the roof dry more effectively.

Large moss patches, loose roofing, soft areas, or signs of decay should be evaluated before cleaning. Removing the visible growth will not correct roofing materials that have already deteriorated.

Remove Roof Debris Safely

Leaves, pine needles, branches, and other debris often collect in valleys, behind chimneys, around skylights, and near roof edges.

This buildup can hold moisture against roofing materials and slow the drying process. It may also block runoff, clog gutters, hide damage, and encourage moss growth.

Debris in a valley is especially concerning because valleys carry concentrated water from several roof sections. When the path becomes blocked, water may move sideways beneath shingles or overflow toward areas that were not designed to manage it.

Roof cleaning should be approached carefully. Sharp tools may scrape protective surfaces, while aggressive brushing can loosen granules from asphalt shingles. Pressure washing may force water beneath roofing materials and damage sealants, coatings, or flashing.

Small debris may be removed from a safe ladder position using tools approved for the roof material. Avoid leaning beyond the ladder’s safe working area or walking across wet, steep, moss-covered, or damaged roofing.

Branches that hang over the home should be monitored for rubbing, breakage, and repeated debris. Larger tree work should be handled by qualified professionals, especially near power lines or difficult roof sections.

When safe access is not available, hire a contractor to clear the roof and inspect the materials beneath the buildup.

Correct Clogged or Damaged Gutters

Gutters and downspouts carry runoff away from the roof, siding, and foundation. When they clog or shift out of position, water may spill over the edge or move behind the gutter.

Leaves, needles, moss, roofing granules, twigs, and nesting materials can all reduce drainage.

During an inspection, look for standing water, sagging sections, leaking joints, loose fasteners, corrosion, and gutters pulling away from the fascia. Overflow marks on siding or trim may show that water is escaping during heavy rain.

Downspouts should remain open and direct water away from the building. Water collecting near the foundation may require extensions or another drainage correction.

Roof-edge damage can sometimes begin with gutter problems. Repeated overflow may contribute to stained trim, rotted fascia, wet soffits, and moisture entering behind exterior materials.

The lower roofing courses and drip edge should also be checked. Water should move cleanly from the roof into the gutter rather than running behind it.

Cleaning may correct a basic blockage, but damaged slope, loose hardware, undersized drainage, or rotted fascia may require repair. The roofing and gutter systems should be evaluated together rather than treated as unrelated parts.

Repair Damaged Roof Flashing

Flashing protects roof joints, edges, and openings where water is more likely to enter.

It is commonly installed around chimneys, skylights, plumbing vents, valleys, dormers, wall connections, roof transitions, and other penetrations.

Flashing problems may include corrosion, bent metal, lifted edges, open seams, missing sections, and gaps created by movement. Previous repairs may also leave layers of roofing cement or sealant that hide damage without correcting it.

A small opening can allow water beneath the roofing surface. From there, moisture may travel along the decking or framing before appearing inside the home.

Flashing should be evaluated with the surrounding roofing material. Repairing only the visible gap may not work when nearby shingles, panels, underlayment, or decking are already damaged.

Surface sealants can provide limited temporary protection in some situations, but they are not a lasting substitute for correctly shaped and installed flashing.

Do not pull, bend, or remove flashing during a basic inspection. Disturbing the material can make an existing problem worse or create a new leak.

Damaged flashing should be repaired or replaced by a contractor familiar with the roof material and the specific water-shedding detail.

Inspect Plumbing Vent Boots and Roof Penetrations

Every opening through the roof creates a location that requires careful sealing and flashing.

Plumbing vents, exhaust pipes, mechanical openings, and other penetrations may use metal flashing, rubber boots, sealants, or a combination of components.

Rubber vent boots can crack, split, harden, or pull away as they age. Metal components may corrode or shift, while exposed sealants may separate from the surrounding surface.

Signs of trouble may include water stains in the attic, damp insulation beneath a vent, cracked rubber, lifted flashing, and staining around the penetration.

The source should be confirmed before a repair is made. Water found beneath a vent may come from the boot itself, nearby shingles, an uphill flashing problem, or condensation inside the pipe.

Applying more sealant over a deteriorated boot may slow the leak temporarily, but it does not restore damaged material. A failed boot or flashing assembly may need replacement.

Contractors should also check the surrounding deck and underlayment for damage before installing the new component.

Address Skylight Leaks

A skylight leak does not always mean the skylight unit itself has failed.

Water may enter through damaged flashing, surrounding shingles, failed seals, roof debris, condensation, or an improperly installed opening.

Signs may include staining around the skylight, damp drywall, peeling paint, wet framing, dripping during rain, or moisture collecting between glass layers.

The timing of the leak can provide useful information. Water appearing only during wind-driven rain may point to flashing or surrounding roofing. Moisture that develops during colder conditions may be related to condensation or indoor humidity.

Inspect the roofing above and beside the skylight for damaged materials, debris, open flashing, and blocked drainage. Water can begin higher on the roof and travel toward the opening before becoming visible.

Adding sealant around the skylight frame may not correct a failed flashing system. It can also trap water or make future repairs more difficult.

A contractor should determine if the solution involves repairing surrounding roofing, replacing flashing, correcting condensation, or replacing the skylight itself.

Prompt attention can limit damage to the roof deck, insulation, framing, drywall, and interior finishes around the opening.

Look for Damaged Roof Decking

The roof deck provides the surface beneath shingles, panels, tile, wood, or membrane roofing. When it becomes soft, rotten, delaminated, or structurally weak, the roofing above it may no longer have a stable base.

Signs of possible deck damage include sagging roof sections, uneven surfaces, soft areas, repeated leaks, darkened attic wood, and fasteners that no longer hold securely.

Much of the decking remains concealed until the existing roofing is removed. A surface that looks acceptable from outside may have moisture damage beneath the underlayment.

Deck deterioration may begin around valleys, roof edges, chimneys, skylights, and vents where leaks are more likely to develop. Blocked gutters and poor drainage can also contribute to damage along the lower edge of the roof.

New roofing should not be installed over soft or deteriorated decking. Damaged sections should be removed and replaced before underlayment and roofing materials are installed.

The source of the moisture must also be corrected. Replacing the deck without repairing failed flashing, damaged roofing, or poor drainage may allow the same problem to return.

Sagging, widespread softness, or damaged framing requires prompt professional evaluation.

Review Attic Ventilation Problems

Poor attic ventilation can contribute to moisture buildup, damaged insulation, mold-like growth, and deterioration of the roof deck.

A balanced ventilation system typically uses lower intake openings and higher exhaust vents to support airflow through the attic. Problems may develop when vents are blocked, damaged, poorly placed, or not working together.

Insulation can sometimes cover intake vents near the eaves. Debris, nesting materials, damaged vent covers, and previous remodeling work may also reduce airflow.

Bathroom fans, kitchen exhaust systems, and dryers should not release humid air into the attic. Moisture from these sources can collect on cold roof decking and framing.

Warning signs may include condensation, damp insulation, rusted fasteners, darkened wood, musty odors, and uneven attic temperatures.

Adding more vents without reviewing the complete system may not solve the problem. Ventilation, insulation, air sealing, and mechanical exhaust should be evaluated together.

A contractor should also confirm that the selected roofing material and roof design are compatible with the ventilation plan.

Correct Condensation and Indoor Moisture

Not every wet attic or ceiling stain is caused by rain entering through the roof.

Condensation can develop when warm, humid indoor air reaches colder roofing, decking, pipes, or framing. This moisture may drip onto insulation and create damage that resembles a roof leak.

Common sources of indoor moisture include bathrooms, kitchens, dryers, humidifiers, and air leaking through gaps around lights, wiring, attic openings, and plumbing.

Signs of condensation may include moisture appearing during colder weather, widespread dampness rather than one clear leak path, rusted nails, mold-like growth, and wet insulation beneath several roof areas.

The solution may involve improving air sealing, correcting exhaust fan discharge, adjusting insulation, and reviewing attic ventilation.

Wet insulation may need replacement when it cannot dry fully or has lost its intended performance. Damaged wood should also be evaluated before the attic is closed again.

The source should be confirmed before roofing materials are removed. Replacing shingles will not correct moisture created by indoor air leaking into the attic.

Inspect Fascia, Soffits, and Roof Edges

Fascia, soffits, drip edges, and lower roofing materials help protect the roof perimeter and support the gutter system.

Damage in these areas may include rot, staining, peeling paint, loose materials, pest entry, sagging gutters, and water moving behind the roof edge.

Overflowing gutters can keep fascia wet and allow moisture to reach soffits or concealed framing. Damaged drip edge may also direct water behind the gutter instead of into it.

Soffit openings may provide attic ventilation, so they should not be blocked by insulation, debris, paint, or nesting materials.

Look for soft wood, discoloration, open joints, loose gutters, and sections that move when lightly checked from a safe location.

Roof-edge repairs may require removing nearby roofing and gutters so damaged materials can be replaced correctly. Covering rot with new metal or paint does not restore the weakened structure beneath it.

The cause of the damage should be corrected along with the visible materials. This may involve gutter repairs, flashing changes, drainage improvements, or replacement of damaged roofing.

Address Problems With Metal, Tile, and Wood Roofing

Roofing problems can look different depending on the material installed.

Metal roofs may develop loose fasteners, open seams, damaged coatings, corrosion, bent panels, and movement around flashing or penetrations. Exposed-fastener systems may require closer attention because screws and washers remain open to weather.

Tile roofing may have cracked, slipped, or missing pieces. Broken tiles can expose the underlayment, while improper foot traffic may damage additional sections during inspection or repair.

Wood shakes and shingles may split, curl, rot, loosen, or develop moss and insect damage. Debris between pieces can hold moisture and slow drying.

Synthetic and composite roofing should be inspected according to the product manufacturer’s instructions. Damage may involve cracking, movement, fading, loose fasteners, or failed accessories.

Repair methods should match the material. Sealants, fasteners, flashing, and cleaning techniques used on asphalt shingles may not be suitable for metal, tile, wood, or synthetic products.

Choose a contractor with direct experience working on the specific roofing system. Material knowledge can affect the quality of the repair and the risk of damaging surrounding sections.

Respond to Storm and Branch Damage

Windstorms and falling branches can damage several parts of a roofing system at once.

A branch may crack shingles, break tile, dent metal panels, damage vents, loosen flashing, or puncture the roof deck. Strong winds can also lift roofing materials and weaken their seals without removing them completely.

After a storm, inspect the property from the ground. Look for branches resting on the roof, missing materials, bent gutters, loose ridge caps, damaged vents, and pieces of roofing scattered nearby.

Do not stand beneath a damaged or unstable branch. Large limbs may shift without warning, especially when they are caught against the roof or another tree.

Check the attic and upper ceilings for water stains, damp insulation, or dripping. Damage may not create an immediate interior leak, so continue monitoring the area during later rainfall.

Small branches that can be reached safely from the ground may be removed carefully. Large limbs, roof punctures, and concealed structural damage should be handled by qualified professionals.

A contractor should inspect the surrounding roofing, decking, flashing, and framing instead of repairing only the most visible impact point. Force from a falling limb may loosen or crack materials beyond the area where it landed.

Photograph storm damage before cleanup or temporary covering begins. These records may help explain the repair needs and support an insurance claim when coverage applies.

Avoid Temporary Repairs Becoming Permanent

Emergency repairs can help limit water entry until proper work can be completed.

Tarps, roofing cement, sealants, and temporary coverings may be useful after a storm or during active leaking. They should not become substitutes for identifying and repairing the cause.

Repeated patching can hide damaged shingles, failed flashing, cracked vent boots, rotten decking, or structural movement. Water may continue traveling beneath the patch even when the visible dripping slows.

Sealant may also crack, separate, or trap moisture when it is applied over wet, dirty, or moving materials.

A temporary repair should be followed by an inspection that determines where the water entered, which materials were damaged, whether moisture reached the deck or framing, and what permanent repair is required.

Emergency coverings should be secured without creating additional holes or directing water toward another vulnerable area.

Homeowners should not climb onto a wet or damaged roof to install a tarp. A professional can complete temporary protection using suitable equipment and then develop a lasting repair plan.

Know When Roofing Damage Requires Immediate Help

Some roofing concerns should not wait for the next routine inspection.

Prompt professional attention is needed when there is:

  • Active interior dripping

  • A sagging ceiling

  • Water near electrical fixtures or wiring

  • Visible structural movement

  • A puncture through the roof

  • Widespread missing roofing

  • Large branches resting on the home

  • Soft or collapsing roof sections

  • Extensive attic moisture

  • Rapidly spreading ceiling stains

Move people, pets, furniture, and belongings away from the affected area when it is safe to do so. Do not touch wet electrical equipment or enter an area where a ceiling appears ready to fall.

Containers may help collect dripping water temporarily, but they do not address the roof opening or concealed moisture.

A contractor should stabilize the area, limit further water entry, and inspect the roof assembly. Structural damage, electrical concerns, and widespread water exposure may also require other qualified trades.

Waiting can allow moisture to spread into insulation, drywall, framing, flooring, and nearby rooms. Early action may reduce the size of the repair even when the permanent work cannot be completed immediately.

Choose a Contractor With Relevant Roofing Experience

Roof repairs should be completed by a contractor familiar with the material and the type of failure involved.

Asphalt shingles, metal roofing, tile, wood shakes, and low-slope membranes use different fastening, flashing, sealing, and repair methods.

Before hiring a contractor, review registration, insurance, references, completed projects, and direct experience with roofs similar to yours.

Ask the contractor to explain how the source of the problem was identified. A proposal that addresses only the visible stain or missing material may overlook damage beneath or above that area.

The written estimate should describe the roofing material, removal, preparation, flashing, fasteners, underlayment, repairs, cleanup, and warranty coverage.

It should also explain how hidden damage will be handled if deteriorated decking, wet insulation, old flashing, or weakened framing is discovered during the work.

Compare the complete repair plan rather than selecting a contractor based only on the lowest total.

A qualified contractor should communicate clearly, document changes, and explain how the completed repair will prevent water from returning through the same area.

Prevent Roofing Problems From Returning

A repair is more effective when the conditions that contributed to the damage are also corrected.

Replacing a damaged shingle may not solve the problem if a clogged valley continues directing water beneath it. New fascia may rot again when overflowing gutters remain unchanged. Moss may return quickly when debris, shade, and slow drainage are ignored.

Preventive care should include regular ground-level inspections, gutter cleaning, debris removal, moss monitoring, attic checks, and prompt attention to loose or damaged materials.

Branches should be kept from rubbing against the roof or dropping heavy debris. Gutters and downspouts should move water away from the siding and foundation.

Attic ventilation, insulation, air sealing, and exhaust systems should also be reviewed when condensation or indoor moisture contributed to the problem.

Keep photographs, inspection notes, repair invoices, warranties, and product information. These records can help identify recurring trouble areas and give future contractors a clearer history of the roof.

Consistent maintenance cannot prevent every storm or material failure, but it can reduce the chance that a small concern will grow into widespread water or structural damage.

Protect Your Port Orchard Roof

Common roofing problems are easier to manage when they are identified before water reaches the structure beneath the surface.

Leaks, missing shingles, moss growth, damaged flashing, blocked gutters, poor ventilation, and storm damage may begin as separate concerns, but they often affect one another. A clogged valley can force water beneath shingles. Damaged flashing can soak the roof deck. Poor attic ventilation can create moisture that looks like an exterior leak.

Homeowners should watch for changes in the roof, attic, gutters, ceilings, and exterior trim. Ground-level inspections, attic checks, gutter cleaning, debris removal, and prompt attention after storms can help reveal trouble early.

Repairs should address the source of the problem rather than only the visible symptom. Repeatedly sealing a leak or replacing one damaged material may not provide a lasting solution when nearby flashing, decking, drainage, or ventilation also needs work.

Safety should remain part of every roofing decision. Wet surfaces, moss, steep slopes, damaged decking, and unstable branches create serious risks. Work that cannot be completed safely from the ground belongs with a qualified professional.

Buildwith3h helps Port Orchard property owners coordinate roof repairs, drainage improvements, structural corrections, inspections, and related exterior construction.

Contact us to discuss roofing concerns and begin planning repairs that address the source of the problem while helping protect the rest of your property.

Kaylee Westmark
Kaylee Westmark

Kaylee Westmark is a seasoned expert in the construction industry, specializing in the unique needs of Port Orchard, WA. With years of experience working with local contractors, she understands the intricacies of home renovations, commercial builds, and the various services essential for successful construction projects. Kaylee is passionate about helping homeowners navigate the complexities of building permits and local regulations, ensuring that every project aligns with community standards. Her commitment to quality and local craftsmanship shines through in her writing, where she shares insights and practical advice for anyone looking to enhance their living spaces or undertake significant construction projects.